Showing posts with label tween. Show all posts

Wednesday, June 12, 2013

Maysen Hi-Lo Dress

Pin It
We all know the hi-lo dress or skirt is very popular right now.
From casual to formal, this dress has lots of style!
Celebrities are wearing them for every occasion.
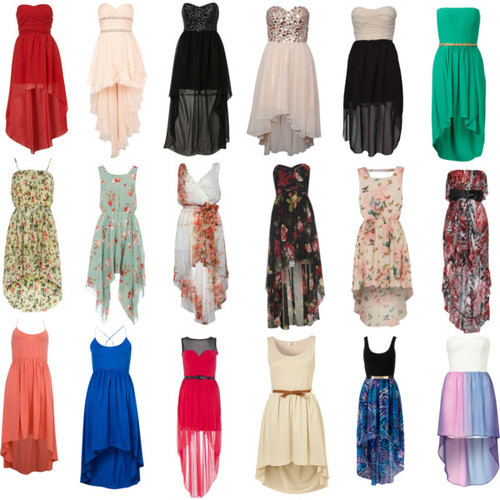

I am trying to learn how to style watch.
Follow trends.
Design from that point.

And then create a pattern.
For a little girl.
That gives her a little "oomph" but still keeps her covered.

I had a trial run but didn't like the bodice much.


And I received quite a bit of feedback from my gals in
the {SIG} Creations Patterns group on Facebook.
The skirt also needed to have more volume.

But volume can be a challenge if you want to keep it cost effective.
Most longer dresses eat up fabric very easily.
This makes it not affordable for boutique seamstresses to make.

Taking all that in to consideration,
I went to bed that night and my brain would not shut off.
Low and behold, my dreams held my answer.

Eager to get up the next morning, I sketched a couple of alternative bodices.
Finally, I settled on tweaking an existing pattern,
cutting off one sleeve, making it a one-shoulder bodice.


The result makes me smile!
Sofi loved it as well as if you couldn't tell by the photos!
I couldn't stop there.

I have decided this dress will have 4 sleeve options and instructions for a tie
on the opposite shoulder for those that are a bit more conservative.
Of course, I had to sew out another one, with the 3/4 length sleeve.


I have to wait patiently for one of my girls to come home.
I want to see that sleeve draped on an actual arm!
So exciting!!!

Now, comes time to start drafting all the sizes.
Then it will be time to write the pattern.
Oh what fun this is!

But I think you will be pleased when the pattern comes out.
I will even add the sash tutorial in the pattern.
What an amazing little dress.
::swoon::
{SIG}nature Creations

Monday, June 11, 2012

The Millie Skirt Pattern

Pin It
I finally got the pattern done!
And the testers have tested it for me.
So tomorrow, I make the corrections and start
selling both the toddler and the tween version.


I really like this skirt.
It may be my favorite one yet.
And I have a plan for a modified women's version.
As a matter of fact, tomorrow I try to make one for me.
Then I need testers for women's sizes minus me (size 6/8).


Next on the list is the Millie Dress, or so I think.
Either that or a new peasant dress I have come up with.
Can't decide.

Hope you all are having a fabulous Monday!

{SIG}nature Creations

Monday, June 4, 2012

D-Ring Adjustable Ribbon Belt Tutorial

Pin It

When my kids were younger,
I had a HARD TIME finding belts for them.
I know everything has an adjustable waist these days
but nothing can replace a cute belt.

What I love about the ribbon belts is that they are reversible.
You get 2 colors on a belt at one go!
Can't beat that.

And the best part, you can make a ton for CHEAP!
We all like cheap.
Should also only take a few minutes to make.
Great, easy project!

Materials:
~ 7/8" Grossgrain Ribbon - 1 yd of each color
{I recommend Offray, you can purchase at Joann's or Walmart.}
~ 2 1" D-rings
~ Stitch Witchery
~ Iron/Ironing Board
~ Sewing machine & notions
~ Lighter


Cut your 2 ribbons from about 24"-28" long.
For youth sizes, you may want to go as long as 30"-34".
Using a lighter, burn the edges to seal them shut
otherwise they will fray.


Lay out the ribbon on your ironing board.
Cut the stitch witchery to the same length as your ribbon.
Lay on top of one ribbon.


Place the 2nd ribbon on top of the first one,
covering the stitch witchery and iron.


Following as close to the edge as possible,
top stitch all the way around.
Now, this step isn't absolutely necessary with the
stitch witchery but I like the look of contrasting thread.


After I sew, I like to retrim the ends so they are even.


Slip on your 2 d-rings.


Cut a small piece of stitch witchery.
Fold over the ribbon about 2".


Iron the ribbon down.
Stitch witchery is a great notion to have laying around!


Go back to your sewing machine.
Stitch together your "loop" although the stitch witchery
is holding it down and in place.
I like to stitch a rectangle and then cross with an "X".
This will reinforce your loop.

And there you have it!
All done.
A super cute belt, one happy kid, and a momma that
didn't have to spend $10 to get a belt!


There are so many cute, printed ribbons as well.
You can make them for every season!
I know I have some cute patriotic ribbon
that would make for a super cute belt.

Show us your finished product on Facebook!
We love to see what you do.
Happy Monday Peeps!
{SIG}nature Creations
Related Posts Plugin for WordPress, Blogger...