Showing posts with label toddler. Show all posts

Wednesday, June 12, 2013

Maysen Hi-Lo Dress

Pin It
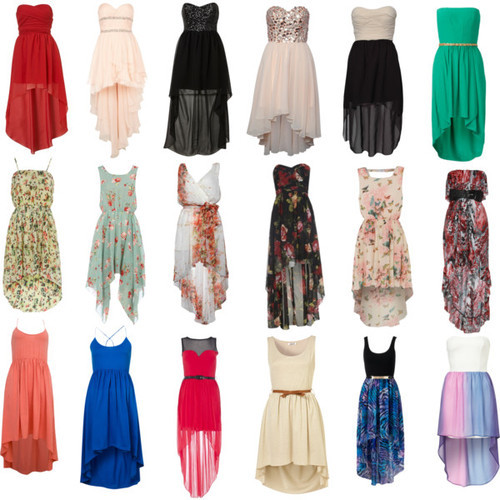
We all know the hi-lo dress or skirt is very popular right now.
From casual to formal, this dress has lots of style!
Celebrities are wearing them for every occasion.


I am trying to learn how to style watch.
Follow trends.
Design from that point.

And then create a pattern.
For a little girl.
That gives her a little "oomph" but still keeps her covered.

I had a trial run but didn't like the bodice much.


And I received quite a bit of feedback from my gals in
the {SIG} Creations Patterns group on Facebook.
The skirt also needed to have more volume.

But volume can be a challenge if you want to keep it cost effective.
Most longer dresses eat up fabric very easily.
This makes it not affordable for boutique seamstresses to make.

Taking all that in to consideration,
I went to bed that night and my brain would not shut off.
Low and behold, my dreams held my answer.

Eager to get up the next morning, I sketched a couple of alternative bodices.
Finally, I settled on tweaking an existing pattern,
cutting off one sleeve, making it a one-shoulder bodice.


The result makes me smile!
Sofi loved it as well as if you couldn't tell by the photos!
I couldn't stop there.

I have decided this dress will have 4 sleeve options and instructions for a tie
on the opposite shoulder for those that are a bit more conservative.
Of course, I had to sew out another one, with the 3/4 length sleeve.


I have to wait patiently for one of my girls to come home.
I want to see that sleeve draped on an actual arm!
So exciting!!!

Now, comes time to start drafting all the sizes.
Then it will be time to write the pattern.
Oh what fun this is!

But I think you will be pleased when the pattern comes out.
I will even add the sash tutorial in the pattern.
What an amazing little dress.
::swoon::

{SIG}nature Creations

Wednesday, November 7, 2012

Handprint Turkey Trivet Tutorial

Pin It

I'm not sure that I have actually put this out here on the blog,
but I also teach twice a week at my triplet's preschool.
It's fun and at times is inspiring.

I get to teach pre-k 3 and pre-k 4 twice a week.
One day is art, the other day is Spanish.
{i am originally from Argentina}

This past week for art, I made these super cute trivets with the students.
I thought it was cute enough to to share with you all.
Not only cute BUT it is super easy.

Seriously will only take you a few minutes to do most of the work.
The rest of the time is spent drying.
Let's get to it!

Supplies:
~ 5" x 5" Tile from anywhere you can find one (Home Depot, Lowe's)
~ Acrylic paint in the following colors...brown, red, orange, yellow, green
~ Paint brushes for each color
~ Sharpies (either fine point or regular) in red, brown, and black
~ Felt circles with adhesive on the bottom
~ Polyurethane or shellac spray

Before you get the paint ready, make sure to write the name and year.
OR, if your child is old enough, they can write it themselves.
I used cute dot letters since these are preschoolers.
I also go ahead and put the felt circles on each of the
four corners on the back side of the trivet.


Pour your paint out on to the surface of your choice.
Since I was dealing with 5 classes and 45 students,
I gave each color its own for obvious reasons.


I had each student come up to me and I painted
their palm and thumb brown and each finger a different color.
I guided their hand to the tile and pressed slowly in to it.


Came out super cute!


After the acrylic dries, it is time to add the "features".
I added an eye (in black Sharpie),
a beak and wattle (in red Sharpie), and
2 feet (in brown Sharpie).

Please forgive the absence of a photo but then next thing
you do is seal your tile by spraying it with polyurethane or shellac spray.

And you are finished!
You have the cutest turkey trivets around.
Don't just make one.
Make some for the grandparents.
You know they will use them for EVERY.SINGLE.THANKSGIVING.

And there you have it...the cutest Handprint Turkey Trivets around!

{SIG}nature Creations

Wednesday, August 22, 2012

Ruffle Fabric Maxi Dress

Pin It

I stumbled across this.
It wasn't really planned.
It was a brainstorm moment between a mommy and me.

And it turned out beautifully.
As a matter of fact, it is very simple to make.
That is, if you have a serger.

Not sure I would have the patience to fight the ruffling
needed if I was just using my sewing machine.
Or attaching the ruffle fabric to the elastic.

{SIG} has created a ruffle fabric maxi dress.
And I can make it in just about any solid color!

You can wear the maxi dress 2 ways.
Melina is wearing the maxi dress without a waist ribbon tie.
Flows beautifully!
{isn't she delish???}


 Or you can add a simple ribbon tie.
We like to use grosgrain ribbon.
Sofi modeled this dress beautifully despite that it was WAY TOO LONG.


I also think this would be a great photographer prop.
Could you imagine doing a mini session or a group session
using several different color dresses?
I sure could!

Hmmmm...maybe I should!
Although my photog skills aren't necessarily up to professional standards.

Either way, these are a great addition to any little girl's wardrobe.
Don't you think?
Now the question remains, should I put them in the Etsy store as a staple?

Let me know!
{SIG}nature Creations

Wednesday, June 20, 2012

DIY Scrappy Flip Flops

Pin It

Scraps of fabric drive me nuts.
They really do.
There just isn't much you can do,
or maybe there.

Today's tutorial is similar to the Scrappy Heart Wreath
tutorial I posted back in January.
You are just going to use a different "base".

It doesn't take long to make a pair.
I made 3 in a matter of about an hour.
This is great for gift giving or for yourself.
You could even do this as a craft at
a birthday party or with your kids.

There isn't a whole lot you will need.
And it won't cost you much,
especially if you use a coupon to Hobby Lobby.
{i get mine on the phone and show it to the cashier
but you can also print it out HERE}

The flip flops cost me all of $0.98.
The scraps I used...FREE.
Can't beat a cute pair of flip flops
for less than a dollar and sure to be one of a kind!

Materials:
~ 1 pair of flip flops (I recommend Hobby Lobby
but you can always go to Old Navy or Target)
~ About 1/3 yd of fabric (if you are doing 1 fabric choice)
~ Scissors or pinking shears
~ Your hands :)


Cut your fabric in to 1" strips.
You can either cut it with straight scissors or pinking shears.
I used the pinking shears to give it dimension.
Then cut the 1" strip in to about 7"-8" pieces.
To give you an idea of how many I used for the girls'
flip flops, I tied about 20 pieces on each shoe, 40 total.


Starting in the center, tie your first strip of fabric on.
Make sure you pull tight!


Tie in to a knot.
Again, make sure it is tight.
This should be good enough to keep
the fabric on there for good!


Continue to add pieces on.
Make sure they are close together.
You can alternate fabrics or use the same one
over and over again, depends on you!


Sofi picked out her fabric and these are her finished flip flops.

  
Now that is a HAPPY girl!
She hasn't taken them off yet.
{don't mind the band aide on her forehead}


And I couldn't stop at one pair.
I had to make some for Miss Gabi too.
She picked out the green flip flops
and wanted pink fabric but I had to throw
in another choice just to make it go better.
Eh, she loves them just the same.


The pair below...those are going to be given away tomorrow.
Size medium!
I love the light blue and the green together.
LOVE.
Want to keep them for myself but I want to share the love.


There are a million things you can put in the center
of these flip flops like a fabric bloom or bow.
Maybe I'll have to show you some embellishments
later this week or next week.

A big THANK YOU to Skye Reve Fabrics 
for sponsoring the tutorial today.
All the lovely fabrics shown were provided by Natasha.


She is a great gal and great to work with.
If you are looking for fabric, check her out!

And please, stop by our Facebook Fan Page.
Show us what you made from this tutorial!

Don't forget, come back tomorrow to win a pair!
Happy Wednesday Peeps!

{SIG}nature Creations

Monday, June 11, 2012

The Millie Skirt Pattern

Pin It
I finally got the pattern done!
And the testers have tested it for me.
So tomorrow, I make the corrections and start
selling both the toddler and the tween version.


I really like this skirt.
It may be my favorite one yet.
And I have a plan for a modified women's version.
As a matter of fact, tomorrow I try to make one for me.
Then I need testers for women's sizes minus me (size 6/8).


Next on the list is the Millie Dress, or so I think.
Either that or a new peasant dress I have come up with.
Can't decide.

Hope you all are having a fabulous Monday!

{SIG}nature Creations
Related Posts Plugin for WordPress, Blogger...